Showing posts with label Treasure Hunt. Show all posts

Easter Egg Shape Hunt!


My kids LOVE Easter Egg Hunts.
Instead of filling the eggs with candy or toys, I decided to use this as a fun learning activity about shapes!
This is perfect activity for preschool, Easter parties, and at home. 
It was quick to put together and LB(4) and LL(2) had so much fun learning about shapes!


Supplies:

Prep Work:
1. Trace some basic shapes onto craft foam and cut them out. I chose 5 shapes, and cut out 3 of each shape. You can do as many or as few as you want. :)


2. Put each of the shapes inside of a plastic Easter egg. If you want, you can also leave some of the eggs empty so you have more to hide. :)


3. **OPTIONAL: Draw a grid on a piece of paper for all the shapes you have cut out.


TIME TO PLAY!

1. Hide all the Easter eggs around the room, house, or yard.


2. Send your kids out to find the eggs!

3. When they find an egg, have them run back to you and open it to see if there is a shape inside. If there is a shape, have them name the shape!


4. If you made a grid, have them then place the shape onto the grid. If you don't have a grid, just line them up or put them in a bowl. :)


5. After they've found all the eggs and all the shapes, you can put them back in the eggs and play again! My kids even wanted their own turn to hide them for me!


Check out more of our Easter activities! 
HAPPY EASTER!


http://www.littlefamilyfun.com/2013/03/jumping-eggs.html

http://www.littlefamilyfun.com/2013/03/easter-bunny-countdown.html

http://www.littlefamilyfun.com/2013/03/easter-egg-puppets.html


You might also like these fun SHAPE activities!


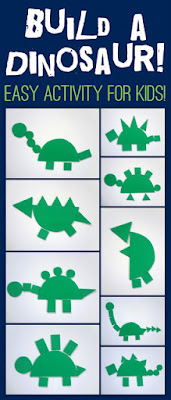
http://www.littlefamilyfun.com/2013/09/build-dinosaur.html


Grab one of these SHAPES workbooks to go along with this activity!


You might also like:
  

Have fun!

We are a participant in the Amazon Services LLC Associates Program, an affiliate advertising program designed to provide a means for us to earn fees by linking to Amazon.com and affiliated sites.

Counting Turkey Feathers


It's Turkey season!
So I created this simple Turkey File-Folder game for LB(4) to practice counting to 20.
He LOVED it. And there are multiple ways you could use this too!
Winner, winner turkey dinner! :)

Prep Work:
  • If you want this as a file-folder game, get out a file folder. OR you can just do the same thing on a piece of paper. (I like the file-folder because when it's open it's bigger than any pieces of paper I have. Gives more space for the turkey!)
  • So, cut a circle out of a piece of scrap paper. Place it in the middle/bottom of the opened file-folder. (This will be where the turkey body goes)
  • Use this scrap circle piece to measure about where the feathers will go. (Just so you have enough room for all 20!)
    • I divided the circle into thirds, like a pie. The top 2 will be where the feathers go, 10 on each side.
    • Then, I divided each third in half. Finally, in each half I marked so there where five segments each. I hope this makes sense. It's just an easy way to make sure you have space for 20 feathers. :)
  • Then with another piece of scrap paper, cut out a feather shape that fits in those segments. It can be skinny on the bottom and more full as it goes up to the tip. (But you don't want it too fat, or it will be hard to fit them all on. The brown one pictured below ended up being too fat. Skinny feathers are good for this game!)


  • Next, get out 4 sheets of craft foam in the following colors: red, orange, yellow, green.
  • Trace your feather onto each craft foam sheet. 5 feathers for each color.
  • Cut out all the feathers. (Again, mine ended up being too fat. I trimmed them all up a bit.)


  • Cut out a brown circle out of construction paper and glue it into the file folder.
  • Trace an extra feather with a black marker onto the file folder. Start at the top and go down each side.

  • Cut out eyes, beak, legs, etc. out of construction paper and glue them onto your turkey.
  • In each of the feather shapes on the file folder, write the numbers 1-20.


  • On each of the feathers write the numbers 1-20. (If you want to follow a pattern with the colors, just make sure you do so as you are writing the numbers) 


Finally done! Time to play!!

How to Play:
  • Lay out all the feathers and prompt your child to find the number 1 feather and place it on the turkey. On and on until all the feathers are on! Then count all the feathers on the turkey (good counting practice).


  • Another way to play is to turn all the feathers face down. Take turns choosing a feather and placing it on the correct spot on the turkey.


  • I was asked to teach singing time to the primary children at church last Sunday. Since we were singing a song about being thankful, I thought I would use this fun turkey to help me teach the song!
    • On the back of each feather I put a sticky note with a different way to sing. Here are the variations: 
      • loud, soft, boys only, girls only, big smile, hand on head, repeat after me, clapping, marching, staccato, crescendo, decrescendo, fast, slow, on tiptoes, close eyes, sway, wearing red only, wearing blue only.
    • I taped the feathers on the file folder and had the children pick a number. Whatever the feather said on the back was how we sang the song that time. We did it over and over. It was a lot of fun. :)


  • You could also hide the feathers and have your child hunt for them around the house!


It did take some work to make this, but there are just so many fun ways to play!
LB(4) has played it several times, and we'll probably pull it out each year!
Gobble gobble!


HAPPY THANKSGIVING!


We are a participant in the Amazon Services LLC Associates Program, an affiliate advertising program designed to provide a means for us to earn fees by linking to Amazon.com and affiliated sites.

Dinosaur Fossil Hunt

Our 4th and final Dinosaur activity for our dinosaur theme this week is this easy Fossil-Hunt activity!
This is a very simple way to make your own home-made fossils! And a fun way to help your children feel just like a scientist, discovering their very own dinosaur!


And here are some fun books to go along with this activity!

Supplies:

Prep Work:
  • Draw some basic shapes on a piece of white craft foam to create a dinosaur. I made 2 dinosaurs.
    • First draw a big oval for the body
    • Then a head
    • Then a tail
    • Then legs
    • Then spikes if you want
  • Then cut them out! These are now your fossils!

  • Next, put the shapes on the pieces of construction paper and trace them.


How to Play!
There are several ways you can play. Here are some ideas:


  1. Lay out all the fossils and let your child put them together on the papers like a puzzle.
  2. Get out a big bucket or tub and fill it with rice. Put all the fossils in it and let your child "dig" in it to find them. When they find them, they can figure out where they go by matching them up to the dinosaur shapes drawn on the papers.
  3. Stand on one end of the house with the dinosaur fossils in a bag. Place the papers on the other end. Have them reach in the bag for a piece, then run to the papers to figure out where it goes. Then run back and do it again. (A great way to use some of that endless kid energy!)

  4. Hide the dinosaur fossils in a room and let them hunt for them, matching them up to the papers when they find them. 


Do you like this idea?


And don't forget to check out our other fun Dinosaur Themed Activities for kids!

http://www.littlefamilyfun.com/2013/09/build-dinosaur.html


http://www.littlefamilyfun.com/2013/09/hatching-dinosaur-egg-craft.html

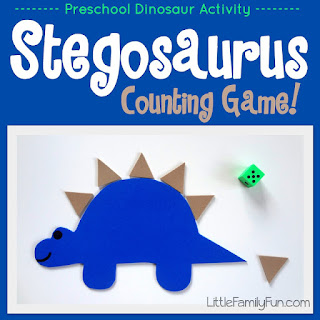
http://www.littlefamilyfun.com/2013/09/stegosaurus-counting-game.html


Looking for more activities for your little BOY?
http://www.littlefamilyfun.com/2012/03/crafts-activities-for-boys.html

(this post contains affiliate links)

Easy Frog Craft for Kids

Summer is in full swing....and ending all too quickly! If you're kids have any bored days where they are jumping off the walls l...