Turkey in the Bag - Game for Preschoolers


Our 2nd activity in our "TURKEY" themed week was this extremely easy, energetic, and educational activity!  All you need is paper, markers, and a bag.

Prep Work:
  1. Cut a couple pieces of construction paper into squares/rectangles (you'll need 27).
  2. On one of the squares, draw a turkey. 
  3. On the rest of the squares, write each letter of the alphabet.
  4. Fold all the papers in half.
  5. Get out a bag (I just used a brown paper lunch sack).


Here's how you play:

  • Take 5-8 of the letters and put them in the bag, along with the turkey.
  • Have your children take turns reaching into the bag to pull out a piece of paper. 
    • If they get a LETTER --- have them say the letter and what sound it makes.
    • If they get the TURKEY --- everyone runs around the room flapping their arms and yelling, "gobble! gobble! gobble! gobble!......"
  • After choosing all those letters, put 5-8 new letters in, along with the turkey and play again!

HAPPY THANKSGIVING!!

We are a participant in the Amazon Services LLC Associates Program, an affiliate advertising program designed to provide a means for us to earn fees by linking to Amazon.com and affiliated sites.

Gratitude Turkey 2012 - Thanksgiving Tradition


It's that time of year again! Time for our traditional Gratitude Turkey! 
We started it during Family Home Evening this week as we talked about what it means to be grateful. It's also a perfect activity to go with our "Turkey" Preschool theme for the week.

**We've done this Thanksgiving tradition for the past few years. Here are links to the ones we've posted in the past:


Here's how we made this year's Turkey:
  • Using a piece of brown scrapbook paper (ours was polka-dotted), cut out 1 big cirlce and 1 smaller circle. (our circles were about 8" wide, and 4" wide). (p.s. Check out our post on an AMAZING deal for scrapbook paper packs on Amazon!)
  • Using orange craft foam, cut out a beak and 2 legs with feet.
  • Using red craft foam, cut out a red piece to be that funny thing under the turkey's beak.
  • Get out 2 big googly eyes.
  • On a piece of paper cut into a rectangle, write, "We are THANKFUL for......"
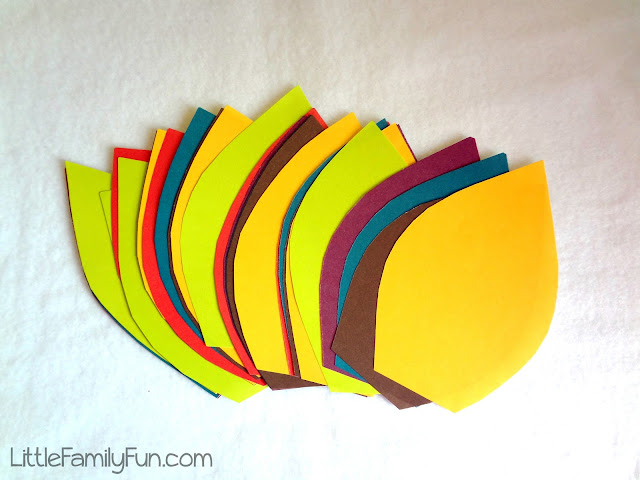
  • Using different colors of scrapbook paper, cut out fat feathers. 


(I stacked the papers on top of each other so I could cut 6 feathers at once. Saved a lot of time.) Keep in mind the feathers don't have to be perfectly shaped. You could draw the feathers on 1 piece then put it on top of all the other papers and cut them out. Or just cut haphazardly....like I did. :)
I cut 6 feathers out of each piece of 12x12 square scrapbook paper.
https://amzn.to/2uUznCh


  •  Then Glue all the turkey pieces together, like so........


Here's what you do:
  • Stick the turkey to the wall with tape or sticky-tack. (We put ours on the inside of our front door).
  • From now until Thanksgiving, whenever someone thinks of something they are thankful for (or each week for Family Home Evening), they will take a feather and write it down. We also decided to draw what it was on the feathers too. :) Then using tape or sticky tack, stick the feathers on the wall all around the turkey.


This is a fun tradition for our family. Like you, we are very blessed with many wonderful things in our lives--big & small. It's fun to spend time thinking about all our amazing blessings. 


We are a participant in the Amazon Services LLC Associates Program, an affiliate advertising program designed to provide a means for us to earn fees by linking to Amazon.com and affiliated sites.

Make your own Frozen Cookie Dough


The other day when I was making cookies, I thought of a super easy way to freeze my extra dough to make cookies later! Here's how it goes:

1. Make your favorite cookie dough.

2. Place a normal ziploc baggie (like the cheap sandwich ones) inside a big cup with the edges folded over the side of the cup:


3. Plop a few big scoops of dough into the cup:
Keep plopping until the cup is full.....

4. Take the bag out of the cup, push out the air and seal the bag:


5. Flatten the dough in the bag, pushing out excess air as needed:


6. Place it in a big gallon-size freezer bag. And on a small piece of paper, write what kind of cookies they are and the time and temperature to cook them:

7. Repeat with the rest of the dough, placing all the small bags of dough in this same big freezer bag. 

8. Then place all the dough in the freezer.

9. When the craving for cookies strikes, pull out a bag of dough:


10. With a knife or scissors, cut the small ziploc bag off the dough and throw it away. Then place the square of dough on a cutting board:


11. Using a knife, cut the dough square into smaller squares:


12. Place the squares on a cookie sheet and bake!

Then eat up! 
(Sorry I didn't take any cooked cookie pictures. I forgot to snap a shot before they all got eaten!  But I will say that even though they were square shaped as dough, they rounded out and were beautiful cookies! It might depend on your recipe, but placing them on as squares shouldn't be too much of a problem in how they look once baked.)


Here are a few reasons why this has changed my life:
  • When I make cookie dough, I usually just bake 1 batch so we don't have tons of cookies sitting around that will either all get eaten by me (bringing endless shame and regret).....or go stale. FREEZING the extra dough ensures that all that hard work of making the dough will be much more appreciated another day!
  • Once you've frozen the dough, it's ready whenever you need instant cookies! Here are a few times when you might want/need a batch of cookies in a hurry:
    • A friend is sick.
    • You remembered you were supposed to take treats somewhere......30 minutes before you leave!
    • A quick after-school snack for your kids.
    • A quick anytime snack for YOU when the craving strikes. :)
  • Cutting the frozen dough is SO easy!!! And you don't even have to round the edges out or anything. Just cut and transfer them to a cookie sheet. It's much easier than freezing dough into logs (which I've done before and it always crumbles when I try to slice it.)
  • When I cut the dough into squares, it reminded me of the packaged refrigerated cookie dough that comes in squares. It's just as easy as that, but WAY tastier.....because it's your own favorite HOMEMADE cookie recipe!!!
  • The Holiday season is upon us! I think I'm going to spend a day making and freezing a bunch of cookie dough so it's all ready to go for when I need it. :)


Easy Frog Craft for Kids

Summer is in full swing....and ending all too quickly! If you're kids have any bored days where they are jumping off the walls l...